Monday, December 5, 2011

Santa Claus Is Coming To Town

Happy December! I am so excited that it's "the most wonderful time of the year", although it's hard to believe Christmastime is already here. Seriously, where has 2010 gone?! The Walker household is running a bit behind on our decorating this year since we were in Wichita for the long Thanksgiving weekend, but I'm excited to finally post about all of our old and new decor.

First up is my favorite part of Christmas, the real tree. As I mentioned last year, no matter how hard I try I just can't give up on the real Christmas tree. I think it's in my blood and no matter how many times Caton and I talk about "getting a fake tree for next year", I just don't see it happening. Ever. I just love having a real tree way too much to give it up, despite the common complaints: it's freezing cold when you pick it out, you have to buy one each and every year, the needles get all over everything (we are STILL finding them around the house from last years tree), and you have to remember to water it regularly (definitely not my strong point). But it's worth it. It's a small price to pay for all of the positives you get out of it: it's so much fun to searching for the perfect tree with my Love, it makes the house feel so cozy and seasonal, it smells AMAZING (!) every time we walk through the house, and well, it's tradition. It's been a tradition for me every single year of my life and now it's a tradition for Caton and me to carry on and (someday) share with our children. I know lots of people who have fake trees and just swear by them, and that's awesome, but for me, I wouldn't trade anything for all of those special memories attached to real Christmas trees! Here is our tree this year, with the addition of a few more lights and a few more ornaments to make it extra pretty.


I tried a new gift-wrapping technique this year found on (non-other than) Pinterest. Here is the link to this adorable example that I fell in love with! I was super-excited when I found the brown paper, which can sometimes be expensive at craft stores or Target) at Dollar Tree for - you guessed it - $1.00 per role in their shipping section. A friend of mine said she tried this last year and had a horrible time getting the tape to stick, so I went ahead and also purchased the $1.00 per role packaging tape and it has worked perfectly so far! I just made letter stencils, then used some Christmas-themed craft paper I got on sale at JoAnn's last week and went to work on gift-tagging each item with the recipients initial. I LOVE how they have turned out so far!


Next up is our house decorations. Last year we moved in to our rental house the day after Thanksgiving, so we were a bit rushed with unpacking and getting settled while also trying to get our house Christmas-ready so we could enjoy the holiday. Here (and here) is a refresher of how we decorated the house in 2010, using only the decorations we had from our apartment-living days. Wow, was it a shock to go from decorating a tiny apartment to filling up an entire house, but we wanted to work with what we had and avoid buying anything new until the after-Christmas sales, so we made it work! As you can see in the photo above, I bought garland to spruce up the mantle and also used a strand of red LED lights I purchased on clearance last year. I love how it turned out!


Our entry-way table receive a little lovin' this year as well. I moved my (tiny) garland that was placed on the mantle last year and instead placed it on this table, where it fits much better. I brought out my adorable "cowboy snowmen" to liven up the table and also added a fun new piece above. You may remember my Happy Holidays sign from this post last February. My MIL and I found these adorable handmade Christmas signs at our favorite thrift store in Wichita and I have been so anxious to use them for over 10 months!
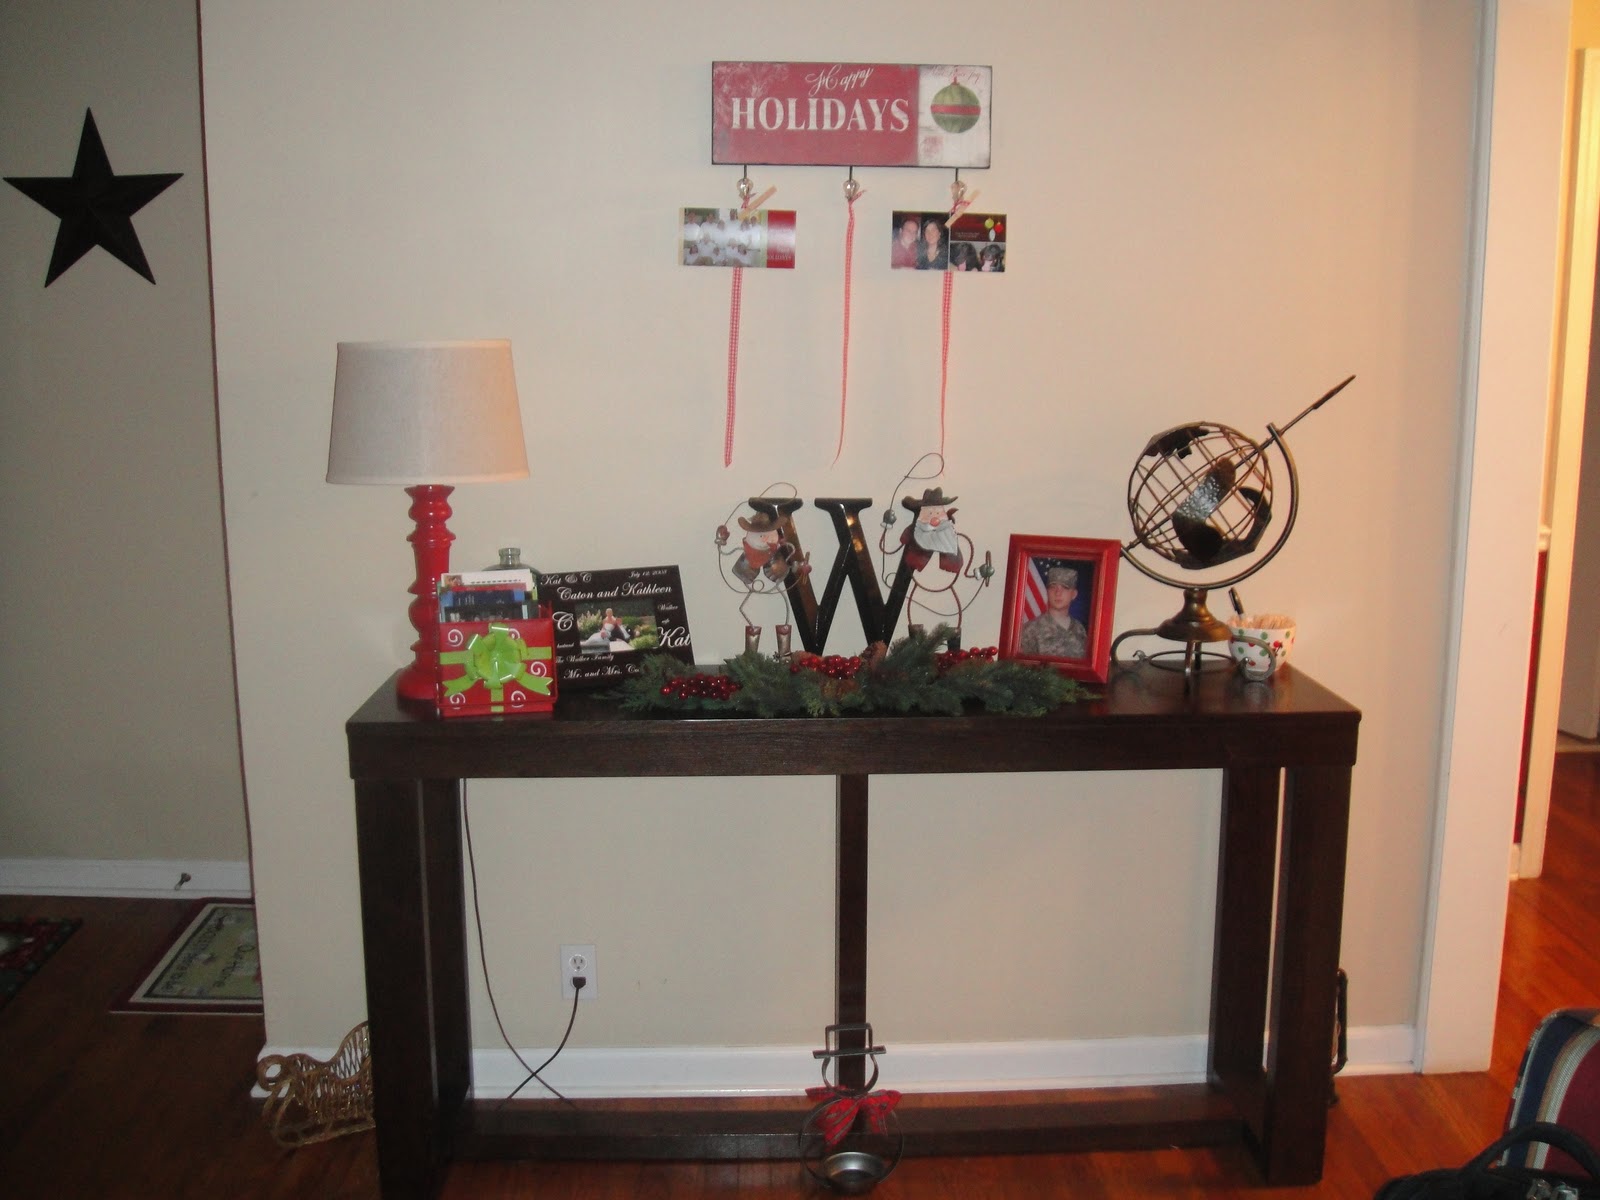

My hubby was kind enough to hang this sign for me over the weekend while I finished up my first Christmas Pinterest project of the season - a holiday card holder. I found the idea from this Pinterest post and knew instantly that I could use my three-hook sign to make my own version. I am one of those people who saves every special note, card, invitation, photo, etc, so it's no surprise that I have an entire bin (or in this case, a gift-wrapped looking bin - seen on the left hand side of the table) to house every Christmas card we have every received as Mr & Mrs Walker, and probably before. I love this adorable idea because it allows us to admire each photo or card all season long. I simply found some ribbon on sale at Michaels, cut them the same length and tied them onto the hooks. Easy-peasy. Then I grabbed one of our small holiday bowls to hold the rest of the clothes pens and a Sharpie ( I use it to write the year on the back of the card if it isn't already printed). Less than five minutes later we had this (my Aunt Molly, and her family, and my friend Mary Beth, and her hubby, are the first two cards we've received this year!).


The Dining Room is decorated pretty much the same as last year, with the addition of my amazing blue runner (found on clearance for $10 at Crate & Barrel - amazing!) and the relocation of my other cute western figures on the buffet.


The Family Room now houses the adorable Santa bowl (Caton's favorite decoration we own) with ornaments as well as our newest decoration. My amazing Aunt Susie gave (GAVE!) us an old Plaza Lights banner she had. *Sidenote - I have been wanting to collect these as long as I can remember, but haven't gotten around to researching/purchasing any of them. When Susie sent me a message on Facebook saying she had one if I wanted it I literally jumped up and down while I was sending her a comment back, and then I went to pick it up the very next night. Super excited doesn't even begin to describe it. It's perfect in our Family Room, which has a super-long wall that is hard to fill/decorate, and we just smile every time we walk into the room. Love Love Love!


And last, but not least, is our outside decor. We went on an Christmas-clearance-spending-spree last year after Christmas, so I have been waiting many months to finally decorate our house with lights. It took us a couple weeks (and learning the hard way to not take advantage of the 50 degree weather in early December) and some frozen fingers and toes, but we (and when I say "we" I mostly mean Caton!) finally got them up on the house and couldn't be more excited. I love them and think the lit up Christmas tree in the front window is adorable! Don't mind the security light over the garage. We still want to get some lights on the bushes, so I'll update the photos after we get the new lights up this weekend.


Well, that wraps up the holiday decorations at Casa de Walker... for now. I still have a few Pinterest projects I want to tackle this weekend, so stay tuned for those updates. We could not be more excited to spend Christmas Eve and Day with the Fagan family and enjoy our tree and decorations all month long!

Monday, November 21, 2011

It's the Most Wonderful Time of the Year

Maybe that should say it's almost the most wonderful time of the year?! It's hard to believe Christmas is a little over a month away, but we are getting super excited! I'm normally not one of those who decorate and listen to Christmas music before Thanksgiving, but things have been a bit different this year. I have been so anxious to get our decorations up (which I did last weekend - more details to come after we buy our tree next weekend) and get our holiday cards purchased. I just live for holiday cards - making ours and rushing home every day in December to see whose card we receive that day/week to add to our collection.

It goes without saying that I will get our holiday cards from Shutterfly. I just love them so much! Remember these cards from last year?! I still get a smile on my face looking at them online. Well, I'm at it again this year and couldn't be more excited about the cards we've selected (although, Caton won't know which cards "we've" selected until they arrive on our doorstep!). So get ready family and friends... the Walkers will be hitting your mailbox in the next few weeks to wish you a very Merry Christmas and a Happy New Year! And for a sneak peak, check out my widgets on the right hand side of the page... just act surprised when you receive them in the mail, ok?! :)

Monday, October 17, 2011

Fork & Spoon Art

As you all know, I took a little break from blogging and DIYing over the summer, and I also took a break from my thrift store shopping. Yeah, it was as horrible as it sounds, but we were so busy that I wouldn't have had time to work on projects anyway. The last time I went to Savers was back in March and I couldn't have been more excited to find these beauties sitting on the shelves just waiting to be snatched up and, hopefully, given some spray paint love. I have seen other crafty bloggers use these decorations in their kitchens/dining rooms for years and couldn't wait to get my hands on a pair. The ones I found, although a not-my-favorite-or-even-kind-of-doable rusty gold color, were only $3.99 a piece, made of heavy duty metal and well over a foot long each (I put my iPhone in the photo below to show you a comparison). Woohoo! This is what they looked like back when I first picked them up (and how they stayed over the last 6 months while they sat in the basement).


I had seen them all over blogs and websites for years, so I had lots of ideas for how to hang them and what color to spray them, but ultimately went with my beloved Oil Rubbed Bronze. I just love how well they go with the pot holder next to them. I've only had them up for a few weeks, but I still get a smile on my face every time I walk by the kitchen. Such a fun, easy and inexpensive way to add some "art" to the tiny kitchen!


Friday, October 14, 2011

Wine Cork W

So... it's been a little over four months since I've posted anything on the ole' blog. Woops! I knew I was going to take a bit of a break with DIY projects over the summer so Caton and I could spend all of our time enjoying the weather outside, visiting family and friends, going on vacations and not being cooped up in the house, but I have no excuse for the last month or so since fall officially began. I'm happy to report that I have been working on a few fun things around the house, so I'm excited to share them over the next couple of days and weeks.

First up is my wine cork W. I originally saw this idea on Pinterest (I'm just as obsessed as everyone else, for sure!), originally found from this site, and have been gathering up supplies over the last few months. It's no secret that Caton and I enjoy a glass of wine every now and then, and we (well, at least I) have been drinking it since college (as you can tell from the huge hurricane of corks shown below), so there is quite an accumultion of corks. The only problem was that I wanted this particular project to have all real corks instead of those rubber ones that many companies are switching to lately. So, thanks to the help of my lovely vino-loving friends and family, as well as generous wine bar up in Parkville that let me raid their stash, I finally had all the corks I needed.


The process is pretty self explanatory... buy a cardboard letter from Hobby Lobby, arrange corks as you wish (asking your helpful hubby to cut a few of them to size with the appropriate tools) and hot glue the corks to the letter. When you take out the months of waiting time to come up with enough real corks to fill the W, this entire project only took about 20 minutes. So easy and such a fun addition to my favorite piece of furniture in our entire house, my 9-cubby shelf!


Friday, June 3, 2011

Mason Jars & Worm Drive Clamps = Birthday Gifts

I know it sounds absolutely crazy, but I promise that when you take one of these, and one of these, along with some craft paint and a piece of wood...

you get a pretty little something that looks like this…


I was introduced to Pinterest (one of my new favorite sites in the whole wide world – yes, I love it that much) AND this amazingly fun mason jar vase by one of my coworkers/friends that loves all things crafts/projects/DIY as much as I do. It was love at first sight email-showing-each-other-cool-craft-ideas-and-projects-we-want-to-DIY-at-home. She’s the best. Anyway, when she sent me a joking email with a picture of this fun vase and said, “I think you should make this for me for my birthday next month!” little did she know I would actually pin this to my Pinterest board and most definitely make it for her birthday the following month.
This project is pretty quick and easy; it took me two nights once I had all of my supplies. I had about a month to work on this since her birthday was later in May, so I took my time finding the perfect mason jar throughout the month. I tend to see them every time I go thrift shopping, but I have rarely seen color tented jars, so I was super excited to find a blue/green mason jar a few weeks ago. Then, I went to a local hardware store to pick up a metal worm drive clamp. They come in various sizes, and are probably even less expensive at big box stores like Home Depot and Lowe’s. I think the one I picked out was around $2.00. I had some scrap wood on hand at home, but wanted this to be a specific size and style, so I went ahead and picked up a small piece of wood at the hardware store as well, which my dad helped me cut it to size with his skill/hand saw. I also had some craft paint on hand (black, white and teal – which is just what I was wanting) so I was ready to get to work.
The first night was spent painting the piece of wood. First I painted the entire thing white (as shown below), let that dry for a while, and then alternated brushing on some black and teal paint in random spots. I didn’t really have a specific technique; I just brushed on some paint and used an old rag (or the dry part of the brush, at times) to give it an antiqued look. Lucky for me, I loved the end result!

After the paint had dried overnight, I requested my Dad’s help once again. I found the exact spot that I wanted the clamp to be attached to the wood, and marked it with a pencil. My Dad then drilled a pilot hole through the clamp. Since the wood was soft enough, he didn’t have to drill a pilot hole into the wood (This is just one of the reasons why I LOVE having a dad that has owned a construction company for as long as I’ve been alive. If I had been taking on this project as the novice that I am, I would have gone about this all the wrong way, so I was very thankful for his experience and help!). After he put a tiny screw through the clamp and into the wood, I simply slid the jar into the clamp, tightened it with a screwdriver and the project was complete!


I gave her the gift the next morning and, much to my delight, she was surprised (she had forgotten she even sent me the picture) and loved it. Success! Now I just have to find another “perfect” mason jar so I can make one for myself!